Top Articles
Xamarin Forms: Getting Started
 14793
14793
Introduction:
This article provides an introduction to Xamarin.Forms and how to get started writing applications with it. This will help beginners to quick start with Mobile application development with Xamarin.Forms.
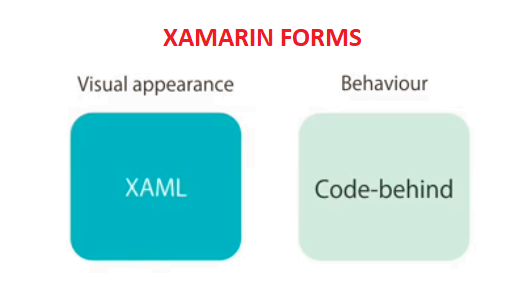
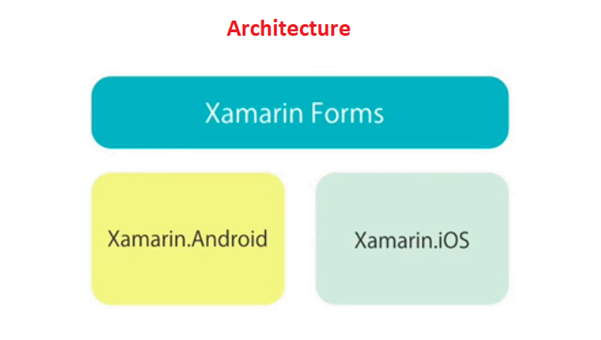
What is Xamarin Forms?
A library that enables you to build native apps for iOS, Android and Windows using a single C# codebase.
Tools and Installation:
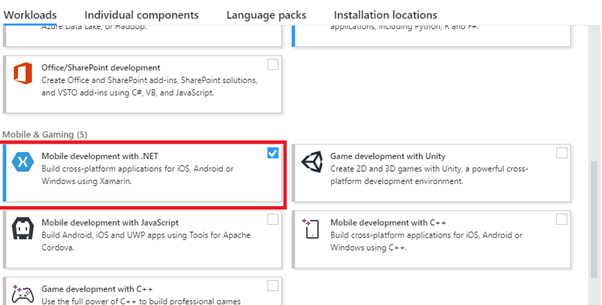
We need to download latest version of Visual Studio to create Xamarin.Forms application. I am using Visual Studio 2017 Community edition. While installation, we must install Xamarin.Forms by selecting Mobile development with .NET in the Visual Studio Installer as shown in below image:
To test a Xamarin.Forms application, we can use Android Virtual Devices.
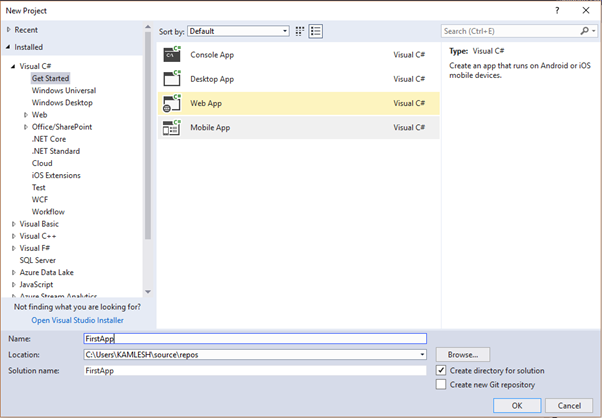
Let’s create first application:
- Select File > New > Project
- Select Installed > Visual C# > Get Started > Mobile App
- Give Name to the application and add Location.
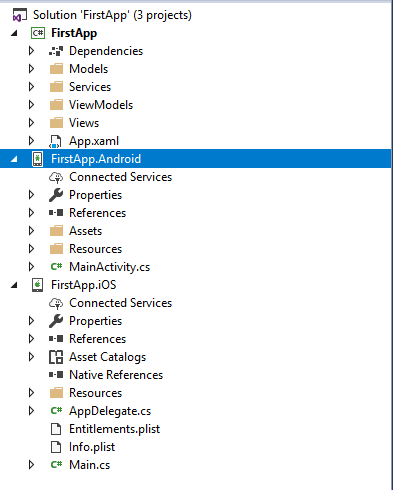
- Click OK. Now Solution Explorer window will look as below:
We will run Android application on Windows. To build iOS application MAC is mandatory.
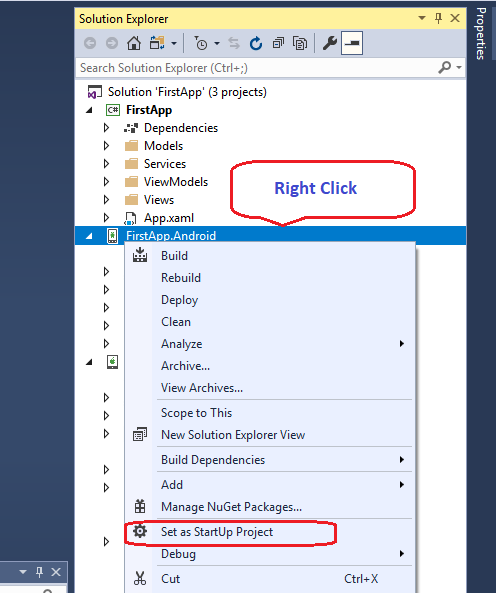
Let’s set FirstApp.Android as startup project.
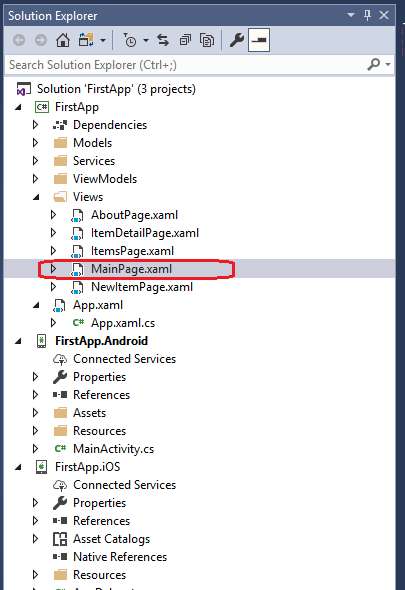
- Open MainPage.xaml file which is under Views folder.
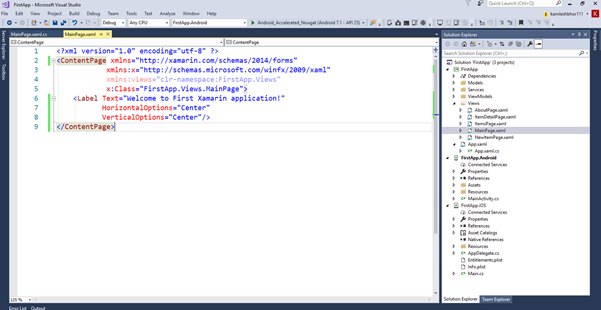
- Update xaml code as below in MainPage.xaml file:
<?xml version="1.0" encoding="utf-8" ?>
<ContentPage xmlns="http://xamarin.com/schemas/2014/forms"
                    xmlns:x="http://schemas.microsoft.com/winfx/2009/xaml"
                    xmlns:views="clr-namespace:FirstApp.Views"
                    x:Class="FirstApp.Views.MainPage">
                    <Label Text="Welcome to First Xamarin application!"
                    HorizontalOptions="Center"
                    VerticalOptions="Center" />

</ContentPage>
- Update MainPage.xaml.cs file as below:
using System;
using Xamarin.Forms;
using Xamarin.Forms.Xaml;

namespace FirstApp.Views
{
                    [XamlCompilation(XamlCompilationOptions.Compile)]
                    public partial class MainPage
                    {
                    public MainPage ()
                    {
			InitializeComponent ();
                    }
                    }
}
Running the First application using Android Virtual Machine:
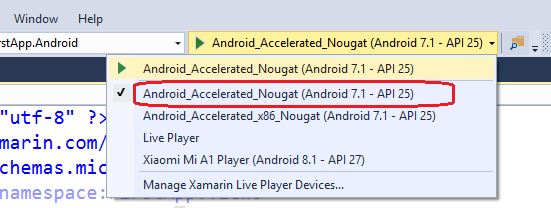
- Select Android_Accelerated_Nougat option as below and click on it to Run:
- Application will run in Android emulator as below:
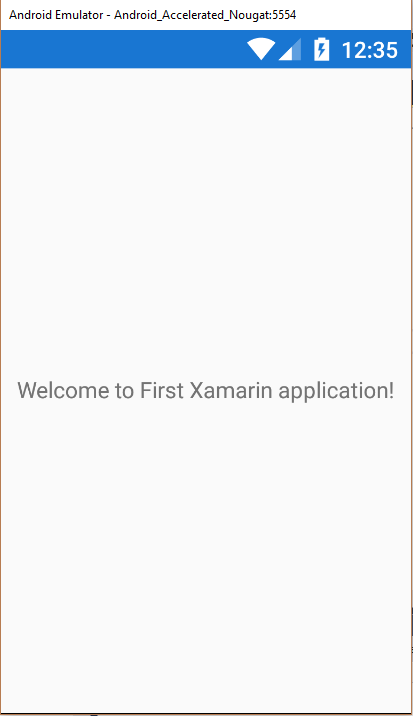
In this way, we have created first xamarin forms application successfully. More about xamarin
You may also be interested in...
- Slack Integration with C#
- Xamarin Forms: Getting Started
- Part 1: Introduction to C#
- Part 2: Arrays and Function in C#
- Part 3: OOPs Concepts in C#
- Part 4: Constructor/Destructor in C#
- Part 5: Abstract class in C#
- Part 6: Indexer,Delegates, Anonymous Method, Lambda expression in C#
- Part 7: Collections in C#
- Part 8: Generics in C#
- Part 9: Attributes in C#
- Part 10: Sealed/Partial class in C#
- Part 11: MultiThreading in C#
YOU DON’T HAVE TO HAVE AN IN DEPTH KNOWLEDGE IN ANDROID / IOS / WINPHONE DEVELOPMENT TO START OFF WITH XAMARIN… BUT YOU WILL END UP WITH AN IN DEPTH KNOWLEDGE OF MOBILE DEVELOPMENT ONCE YOU’RE DONE WITH XAMARIN

Discuss about post