Setup OpenCode in VS Code with Free AI Models - No Credit Card! (2026)
By Kamlesh Bhor · 📅 27 May 2026 · 👁️ 2225
💥 GitHub Copilot Just Changed Its Pricing. Here's Your Free Alternative.
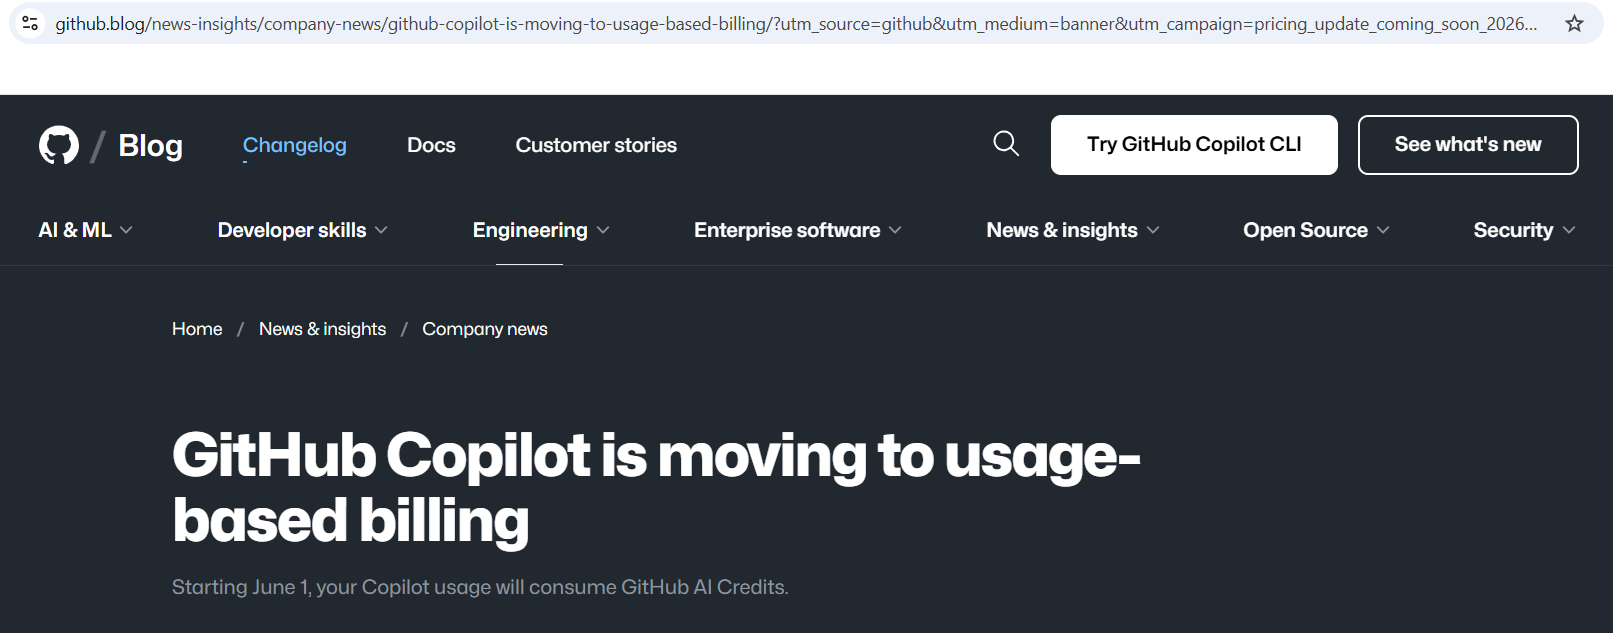
On June 1, 2026, GitHub Copilot quietly switched to usage-based billing. Same subscription price - but now every chat message, every agentic session, every code review costs you tokens. Heavy users are already reporting higher effective costs. Developers are frustrated.
If you've been waiting for a good reason to try something different, this is it.
OpenCode is a free, open-source AI coding agent that runs right inside VS Code. You connect it to free AI models through OpenCode Zen - no credit card, no token meter ticking in the background, no surprise bill at the end of the month.
In this guide, I'll walk you through the complete setup from scratch. By the end, you'll have a working AI coding assistant inside VS Code, powered by a genuinely free model, ready to help you write real C# and .NET code.
⏱️ Setup time: ~8 minutes
✅ What You'll Learn in This Guide
- ✔ What OpenCode is and why it's worth your time in 2026
- ✔ How it compares to GitHub Copilot, Cursor, and Windsurf
- ✔ How to install OpenCode in VS Code with one command
- ✔ How to get a free API key from OpenCode Zen (no card needed)
- ✔ How to connect and use free AI models for real .NET/C# code
- ✔ The OpenCode Beta extension — a visual sidebar chat alternative
- ✔ Ready-to-use prompts for .NET developers
- ✔ Best practices, common mistakes, and a quick reference card
📺 Watch the Full Video Tutorial
Prefer watching over reading? Here's the complete 8-minute video walkthrough. Follow along with the written steps below for all commands and code examples.
▶ Watch on YouTube: [Setup OpenCode in VS Code with Free AI Models — No Credit Card! (2026)]
Watch in YouTube
🧠 What Is OpenCode?
Think of OpenCode as a smart coding partner that lives inside your terminal. It's not just autocomplete - it's a full agentic coding assistant that can read your project files, understand your codebase, write code, and run commands on your behalf.
Here's a simple analogy: imagine a capable junior developer sitting right next to you. You describe what you need, they look at your actual code, and they make the changes - while you watch and approve. That's exactly what OpenCode does, except it's free and never needs a coffee break.
A few things that make it stand out:
- Open source - MIT licensed, free forever, no vendor lock-in
- 75+ AI providers - OpenAI, Anthropic, Google, Mistral, local models via Ollama, and more
- Agentic by design - reads files, edits code, runs terminal commands
- Works inside VS Code - integrates directly with the editor you already use
- Provider-agnostic - switch models or providers with a single command
The best part for us today? OpenCode has its own built-in provider called OpenCode Zen with free AI models ready to go - no credit card required.
💡 Why OpenCode in 2026? How Does It Compare?
The AI coding tools market is moving fast - and honestly, a bit chaotically right now. Let's quickly look at where things stand before we decide why OpenCode is worth your time.
| Tool | Price | Key Notes |
|---|---|---|
| OpenCode | Free | Open source, 75+ providers, agentic |
| GitHub Copilot | $10–39/month | ⚠️ Usage-based billing from June 1, 2026 - heavy users pay more |
| Windsurf (formerly Codeium) | Free tier + $15/month Pro | Now owned by OpenAI after $3B acquisition |
| Cursor | $20/month | Popular VS Code fork, solid but paid |
💥 Important: GitHub Copilot moved to token-based billing on June 1, 2026. The base price ($10/month for Pro) hasn't changed, but chat-heavy and agentic workflows now consume AI Credits based on token usage. If you use Copilot Chat heavily or run agentic sessions, your effective monthly cost will likely be higher than before.
🔄 Also worth noting: Windsurf (formerly Codeium) was acquired by OpenAI for approximately $3 billion in March 2026. Its future pricing and model access is uncertain - not ideal when you're counting on a tool for daily work.
OpenCode has none of these concerns. It's open source, free to run, and completely provider-agnostic. If one free model disappears tomorrow, you switch to another in seconds.
✅ Prerequisites Checklist
Before we start, make sure you have these two things ready:
☐ VS Code installed (any recent version)
☐ Node.js v18 or higher installed
☐ 8 minutes of your time
Check your Node.js version by opening any terminal and running:
node -vYou should see something like v22.x.x. If you get an error or see a version below 18, download the LTS version from nodejs.org.
💡 Alternative install methods: If you prefer not to use npm, OpenCode also installs via a curl script on Mac/Linux, or via Homebrew on Mac (
brew install opencode). The npm method works on all platforms, so that's what we'll use here.
That's genuinely everything you need. Let's build.
🚀 Step 1 - Install OpenCode
Open VS Code. Then open the integrated terminal using Ctrl + backtick on Windows/Linux, or Cmd + backtick on Mac.
⚠️ Use VS Code's built-in terminal - not an external PowerShell or Command Prompt window. This is important for the VS Code extension to auto-install correctly in Step 2.
In the terminal, run:
npm install -g opencode-aiThis installs OpenCode globally on your machine. It takes about 30–60 seconds. Once done, verify the installation:
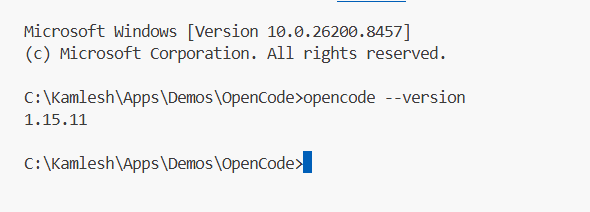
opencode --versionYou should see a version number. If you do - OpenCode is installed and ready.
⚠️ Getting "command not found" after install? Your npm global bin folder might not be in your system PATH. Run
npm config get prefixto find the path, then add/bin(Mac/Linux) or\bin(Windows) to your PATH environment variable. Restart your terminal after making the change.
🔌 Step 2 - Launch OpenCode and Auto-Install the VS Code Extension
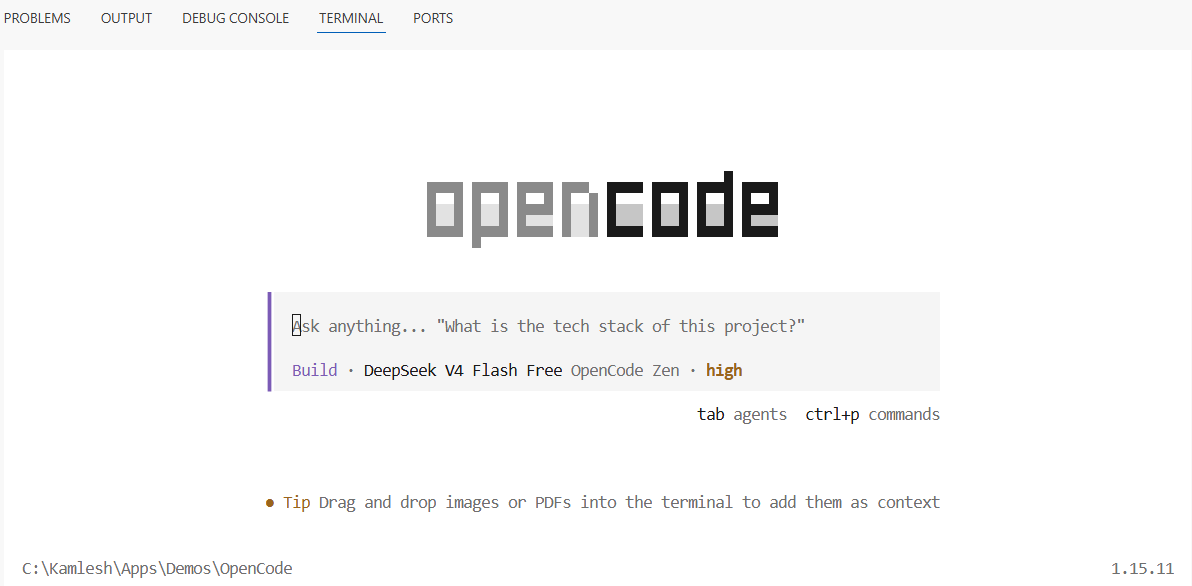
Here's something that surprises a lot of people: there's no OpenCode extension to search for and install manually in the VS Code marketplace. The extension installs automatically the first time you launch OpenCode inside VS Code's integrated terminal.
So let's do that now. In your VS Code integrated terminal, type:
opencodeOpenCode detects that it's running inside VS Code and automatically installs and activates its extension. You'll see the OpenCode TUI (Terminal User Interface) appear - a clean, keyboard-driven interface that becomes your AI command center.
Once it's up and running, OpenCode adds these handy keyboard shortcuts to VS Code:
| Shortcut (Windows/Linux) | Shortcut (Mac) | Action |
|---|---|---|
Ctrl + Esc |
Cmd + Esc |
Open OpenCode in split terminal view |
Ctrl + Shift + Esc |
Cmd + Shift + Esc |
Start a new OpenCode session |
Alt + Ctrl + K |
Cmd + Option + K |
Insert a file reference into your prompt |
That last shortcut is very handy - you can reference specific files or even specific lines (like @ProductsController.cs#L24-45) directly inside your prompts for precise, context-aware responses.
🔑 Step 3 - Get Your Free API Key from OpenCode Zen
Now we need to connect OpenCode to a free AI model. This is where OpenCode Zen comes in.
OpenCode Zen is OpenCode's own curated model hub - a set of AI models tested and verified by the OpenCode team, served through their own infrastructure. No setup complexity, no provider account juggling. And right now, they offer four completely free models.
Here's how to get your key:
- Open your browser and go to opencode.ai/auth
- Sign in with your Google or GitHub account - takes about 10 seconds
- Your API key is right there on the dashboard - click to copy it
That's it. No billing page. No credit card form. No "start your free trial" button that secretly requires payment info. Just sign in and your key is there.
🔒 Keep your API key safe. Don't paste it into public repos, share it in screenshots, or post it in forums. Treat it like a password - if compromised, regenerate it from the dashboard.
🤖 Step 4 - Connect OpenCode Zen and Pick Your Free Model
Back in VS Code, inside the OpenCode terminal interface, type:
/connectA list of providers will appear. Use your arrow keys to navigate and select OpenCode Zen. Press Enter, then paste your API key when prompted.
Now let's see which free models are available:
/modelsLook for models tagged as Free:
| Model | Model ID | Best For |
|---|---|---|
| DeepSeek V4 Flash Free | deepseek-v4-flash-free |
Fast coding, logic, C# - my top pick |
| MiniMax M2.5 Free | minimax-m2.5-free |
Great all-rounder, good explanations |
| Nemotron 3 Super Free | nemotron-3-super-free |
By NVIDIA - trial use, not for sensitive code |
| Big Pickle | big-pickle |
Experimental - surprisingly capable |
For .NET and C# development, start with DeepSeek V4 Flash Free. It's fast, handles structured code well, and does a great job with everyday tasks like generating DTOs, writing controller actions, and adding validation.
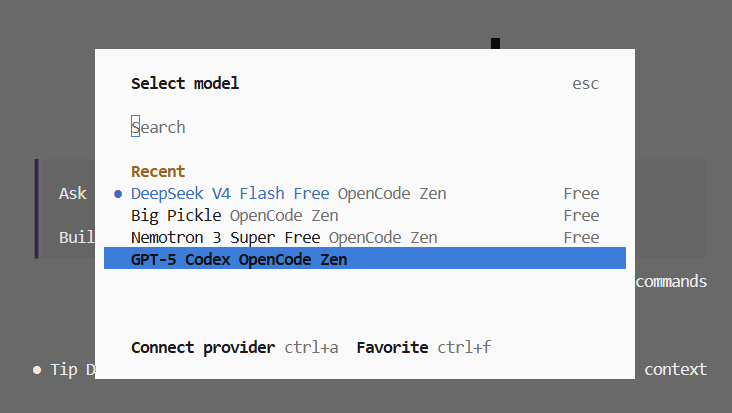
Select it from the list and you're connected. OpenCode is now live inside VS Code with a free AI model.
⚠️ Privacy reminder: During their free period, these models may use prompts to improve training. Don't send proprietary, client, or sensitive code through free models. Use a paid model for production and confidential work.
🏗️ How OpenCode Works Inside VS Code
Before the demo, here's a quick diagram of what's actually happening under the hood - understanding this helps you use OpenCode much more effectively.
┌──────────────────────────────────────────────────────┐
│                    VS Code Editor                    │
│                                                      │
│   ┌─────────────────┐      ┌──────────────────────┐  │
│   │   Your Project  │      │   OpenCode TUI       │  │
│   │                 │      │   (Integrated        │  │
│   │  *.cs files     │◄────►│    Terminal)         │  │
│   │  *.csproj       │      │                      │  │
│   │  appsettings    │      │  > your prompt here  │  │
│   └─────────────────┘      └──────────┬───────────┘  │
│        reads & edits directly         │              │
└───────────────────────────────────────┼──────────────┘
                                        │ API call
                                        ▼
                          ┌─────────────────────────┐
                          │    OpenCode Zen API     │
                          │   (Free AI Models)      │
                          │  DeepSeek / MiniMax /   │
                          │  Nemotron / Big Pickle  │
                          └─────────────────────────┘
Figure: OpenCode reads your actual project files, sends context to the free AI model via OpenCode Zen, and edits your code directly in the editor. You review and approve every change.
The key thing to understand: OpenCode isn't a chat window that gives you code to copy-paste. It has direct access to your files and makes edits in-place. You see exactly what changed, and you approve or reject it - just like reviewing a pull request from a colleague.
💻 Step 5 - Live Demo with Real C# Code
Let's prove this works. I have a basic ASP.NET Core Web API project open - a ProductsController with no input validation:
using Microsoft.AspNetCore.Mvc;

namespace MyApi.Controllers;

[ApiController]
[Route("api/[controller]")]
public class ProductsController : ControllerBase
{
    private readonly IProductService _productService;

    public ProductsController(IProductService productService)
    {
        _productService = productService;
    }

    // No validation — accepting anything the client sends
    [HttpPost]
    public async Task<IActionResult> CreateProduct(ProductDto product)
    {
        var result = await _productService.CreateAsync(product);
        return Ok(result);
    }
}
In OpenCode, I type this prompt:
Add proper input validation to the CreateProduct action.
Use data annotations on ProductDto and return a 400 Bad
Request with validation error details if the model is invalid.
OpenCode reads the file, understands the existing structure, and produces this:
using Microsoft.AspNetCore.Mvc;
using System.ComponentModel.DataAnnotations;

namespace MyApi.Controllers;

[ApiController]
[Route("api/[controller]")]
public class ProductsController : ControllerBase
{
    private readonly IProductService _productService;

    public ProductsController(IProductService productService)
    {
        _productService = productService;
    }

    [HttpPost]
    public async Task<IActionResult> CreateProduct([FromBody] ProductDto product)
    {
        // [ApiController] auto-validates ModelState, but we check
        // explicitly here for clarity and custom error formatting
        if (!ModelState.IsValid)
        {
            return BadRequest(ModelState);
        }

        var result = await _productService.CreateAsync(product);

        // Return 201 Created with a location header — proper REST practice
        return CreatedAtAction(nameof(GetProductById), new { id = result.Id }, result);
    }
}

// DTO updated with data annotation validation attributes
public class ProductDto
{
    [Required(ErrorMessage = "Product name is required")]
    [StringLength(100, MinimumLength = 2,
        ErrorMessage = "Name must be between 2 and 100 characters")]
    public string Name { get; set; } = string.Empty;

    [Required]
    [Range(0.01, 99999.99,
        ErrorMessage = "Price must be between 0.01 and 99,999.99")]
    public decimal Price { get; set; }

    [StringLength(500, ErrorMessage = "Description cannot exceed 500 characters")]
    public string? Description { get; set; }
}
Production-quality output. It added data annotations, fixed the return type to CreatedAtAction (proper REST practice), and included meaningful error messages. All from a free model.
🎯 Ready-to-Use OpenCode Prompts for .NET Developers
One of the most common questions I get is: "What do I actually ask it?" Here are 6 copy-paste ready prompts to get you started with real .NET work:
Generate unit tests:
Generate xUnit unit tests for the ProductService class.
Cover the happy path, null input, and not-found scenarios.
Use Moq for mocking dependencies.
Add logging to a controller:
Add Serilog structured logging to the OrdersController.
Log entry and exit for each action, and log exceptions
with the request context included.
Explain a LINQ query:
Explain this LINQ query line by line. Tell me what each
clause does and suggest a simpler alternative if one exists.
Refactor to use async/await:
This method uses synchronous database calls. Refactor it
to use async/await with Entity Framework Core's async
methods throughout.
Add middleware:
Create a custom ASP.NET Core middleware that logs the
HTTP method, path, status code, and response time for
every request.
Generate an interface:
Extract an interface from the EmailService class that
includes all public methods. Follow the I-prefix naming
convention and add XML documentation comments.
⌨️ OpenCode Commands Quick Reference
| Command | What It Does |
|---|---|
/connect |
Connect a new AI provider |
/models |
Browse and switch AI models |
/help |
See all available commands |
/clear |
Clear current session context |
@Filename.cs |
Reference a specific file in your prompt |
@File.cs#L10-25 |
Reference specific lines of a file |
Ctrl+Esc |
Quick-open OpenCode panel |
Ctrl+Shift+Esc |
Start a fresh session |
🆕 Bonus: OpenCode Beta Extension - A Visual Sidebar Alternative
If you prefer a chat panel in the sidebar over the terminal UI, there's a Beta extension worth knowing about.
The OpenCode Beta extension (sst-dev.opencode-v2) is an official experimental extension from the OpenCode/SST team. Instead of the terminal-based TUI, it gives you a proper chat interface docked in the VS Code sidebar - much closer to what GitHub Copilot Chat or Cursor feel like.
How to Install the Beta Extension
- In VS Code, press
Ctrl+P(orCmd+Pon Mac) - Paste this and press Enter:
ext install sst-dev.opencode-v2 - Or search "OpenCode Beta" in the Extensions panel (
Ctrl+Shift+X)
What's Different About It
| Feature | Standard (TUI) | Beta Extension (Sidebar) |
|---|---|---|
| Interface style | Terminal-based | Visual chat panel |
| Model switching | /models command |
Dropdown inside panel |
| Session management | Via commands | Built-in session list |
| Image upload | ❌ No | ✅ Yes |
| Build Mode (file tracking) | ❌ No | ✅ Yes |
| Stability | ✅ Stable | ⚠️ Beta - bugs possible |
Should You Use It?
If you're comfortable with the terminal, stick with the standard setup - it's stable and full-featured. If you prefer a visual interface similar to GitHub Copilot Chat, the Beta extension is worth trying.
⚠️ Beta disclaimer: The extension is still under active development. You may encounter occasional bugs or UI quirks. The core OpenCode functionality underneath is the same - only the interface differs. When in doubt, fall back to the terminal approach from Steps 1–5.
🛡️ Best Practices - Getting the Most Out of OpenCode
Be specific in your prompts. "Fix the bug" gets you vague results. "The GetProductById method throws a NullReferenceException when the product doesn't exist - add a null check and return a 404 Not Found response" gets you exactly what you need.
Reference files explicitly. Use @ControllerName.cs in your prompt to point OpenCode at the right file. It can find files on its own, but being explicit is faster and more accurate.
Review every change before accepting. OpenCode shows you a diff of what it plans to change. Always read it - AI models can be confidently wrong. Treat it like a code review, not a rubber stamp.
Start fresh for new tasks. Use Ctrl+Shift+Esc to open a new session when switching between unrelated tasks. Keeping the context clean gives better results.
Use it for the boring stuff. OpenCode shines at boilerplate - generating DTOs, writing unit tests, adding XML docs, creating interfaces, scaffolding middleware. Let it handle the grunt work so you can focus on architecture and business logic.
Don't send sensitive code through free models. Free model providers may log prompts during their feedback period. Use paid models for client code, proprietary algorithms, or anything confidential.
⚠️ Common Mistakes to Avoid
Running OpenCode in an external terminal. If you run opencode in a standalone PowerShell or Command Prompt window, the VS Code extension won't auto-install. Always use VS Code's integrated terminal (Ctrl + backtick).
Skipping the Node.js PATH fix. If opencode isn't recognized after npm install -g, your PATH isn't set correctly. Run npm config get prefix and add the result to your system PATH - then restart your terminal.
Sending vague prompts. The quality of OpenCode's output directly reflects the quality of your prompt. Vague in, vague out. Be specific about what you want, what file it's in, and what the expected behavior should be.
Forgetting to start a new session. If you worked on your Products API in one session and switch to a completely different feature, the old context confuses the model. Use /clear or open a new session.
Assuming free models are production-ready for everything. Free models are excellent for learning, prototyping, and everyday tasks. For complex architectural decisions or security-sensitive code, a paid model with better reasoning is worth the cost.
❓ FAQ - OpenCode in VS Code
Q: Is OpenCode really free? What's the catch? OpenCode itself is MIT licensed and free forever - the tool has no cost. The free models in OpenCode Zen are free while their teams collect user feedback. There's no announced end date, but they won't be free indefinitely. Enjoy it while it lasts.
Q: Do I need a credit card to use OpenCode Zen's free models? No. Sign in at opencode.ai/auth with Google or GitHub, and your API key is right there on the dashboard - no billing details required for the free models.
Q: Is it safe to use OpenCode with my real project? For the free models, avoid sending proprietary or client code since prompts may be logged. For personal projects, learning, and open-source work - it's perfectly fine. OpenCode itself does not store or transmit your code outside of the API call.
Q: Can I use OpenCode with other AI providers like OpenAI or Anthropic? Absolutely. OpenCode supports 75+ providers. Type /connect to add any provider, and /models to browse and switch. You can have multiple providers connected simultaneously and switch between them anytime.
Q: What's the difference between the standard extension and the Beta extension? The standard extension uses a terminal-based TUI (installs automatically when you run opencode in VS Code). The Beta extension (sst-dev.opencode-v2) gives you a visual chat panel in the sidebar - same AI underneath, different interface. The Beta is still experimental, so expect occasional rough edges.
Q: Does OpenCode work on Windows, Mac, and Linux? Yes - identical experience on all three. On Windows it works in PowerShell, Command Prompt, Windows Terminal, and VS Code's integrated terminal. No platform-specific gotchas.
🎯 Conclusion - Your Free AI Coding Assistant Is Ready
Let's recap what we covered:
- OpenCode is a free, open-source AI coding agent - no monthly fee, no vendor lock-in
- It installs with one npm command and auto-integrates with VS Code
- OpenCode Zen gives you four free AI models - no credit card, just sign in
- DeepSeek V4 Flash Free is the top pick for .NET and C# work
- The Beta extension offers a visual sidebar chat for those who prefer it over the terminal
The timing couldn't be better. GitHub Copilot just made its pricing less predictable. Windsurf is now owned by OpenAI - nobody knows what that means for the free tier long-term. Cursor still costs $20 a month.
Meanwhile, OpenCode is sitting right here: free, open source, powerful, and ready to run in the VS Code you already have open.
Give it 8 minutes today. Sign in at opencode.ai/auth, grab your key, and ask it to add validation to one of your real controllers. I genuinely think you'll be surprised by what a free model can do.
📌 Quick Reference Card - Screenshot This!
━━━━━━━━━━━━━━━━━━━━━━━━━━━━━━━━━━━━━━━━━━
  OPENCODE SETUP — QUICK REFERENCE
━━━━━━━━━━━━━━━━━━━━━━━━━━━━━━━━━━━━━━━━━━

  INSTALL
  npm install -g opencode-ai
  opencode --version

  LAUNCH (inside VS Code terminal only!)
  opencode

  GET FREE API KEY
  → opencode.ai/auth (no credit card!)

  CONNECT
  /connect → OpenCode Zen → paste key

  FREE MODELS
  /models → pick one:
    • deepseek-v4-flash-free  (best for .NET)
    • minimax-m2.5-free
    • nemotron-3-super-free
    • big-pickle

  KEY SHORTCUTS
  Ctrl+Esc          → Open OpenCode panel
  Ctrl+Shift+Esc    → New session
  Alt+Ctrl+K        → Insert file reference

  BETA EXTENSION (sidebar chat)
  Ctrl+P → ext install sst-dev.opencode-v2

━━━━━━━━━━━━━━━━━━━━━━━━━━━━━━━━━━━━━━━━━━
📺 Watch the Full Video Tutorial
Prefer watching over reading? Here's the complete 8-minute video walkthrough. Follow along with the written steps below for all commands and code examples.
▶ Watch on YouTube: [Setup OpenCode in VS Code with Free AI Models — No Credit Card! (2026)]
Watch in YouTube
Found this helpful? Share it with a fellow .NET developer who's still paying for AI tools they don't need to. 😄

Article by Kamlesh Bhor
Feel free to comment below about this article.
💬 Join the Discussion